

THE PIRATE SHIRT
Thrifted shirt for a $1 at local Salvation Army. This shirt started out white, I decided it was too stark for the costume. Enter 1st dyeing experience ever! I found some dye at my local fabric and craft store, JoAnns. I had never heard of the fabric dye Dylon but I decided to give it a shot. It was $2.99 for the packet, and it worked perfectly. I have to admit it was flipping FUN dyeing the shirt.

THE SASH
2 yards of a polyester material found in the clearance rack for $5 at the fabric store became the pirate sash. Basically you wrap it up and then around the waist. I did distress mine on the ends a little bit, polyester rips nicely but don't even think about dyeing it! I learned the hard way, I tried to dye it even though the packet said not recommended for poly = FAIL. It does not hold the color of the dye, you need a particular dye apparently for poly. I wanted to try it because I had a poly dress that I was debating dyeing too. Better to mess up the sash then the dress I figured... .. .


THE PIRATE ACCESSORIES
The belt I had purchased from Target a while back for $3 just because it was too cool. The ring I believe I found at F21 and I have had it for a while. The Necklace was my grandfathers and I have held on to it because it was his and a unique piece.


THE COAT
My Grandmother made this for my Father. I have held onto it forever and decided it would be the inspiration & anchor piece for the pirate costume. Brown corduroy with felt details and completely lined, dam my Grandmother was GOOD! I learned how to sew from her by the way... ..

THE PANTS
Ah my favorite H&M harem pants.I have had these for about a year or so. I think I spent $10 on them an I LOVE em' so much. Easy to dress up or down and the perfect slouchy pirate pants!


THE HAT
So I must admit I was inspired by my favorite pirate Captain Barbossa, I tried to echo certain things about his attire. The hat proved to be a hard find in my town but I wanted to get it as close to his hat as possible. Geoffrey Rush said that he did not "Feel" like Barbossa until he put the hat on - so yes this piece was important to me. Finally came across a Scare Crow hat and messed around with it to find that it could easily be molded into a pirate hat. Then I went into JoAnns again for a couple of feathers to add on top. The hat was $5 and the feathers where $2-3 each.

THE PIRATE "EFFECTS"
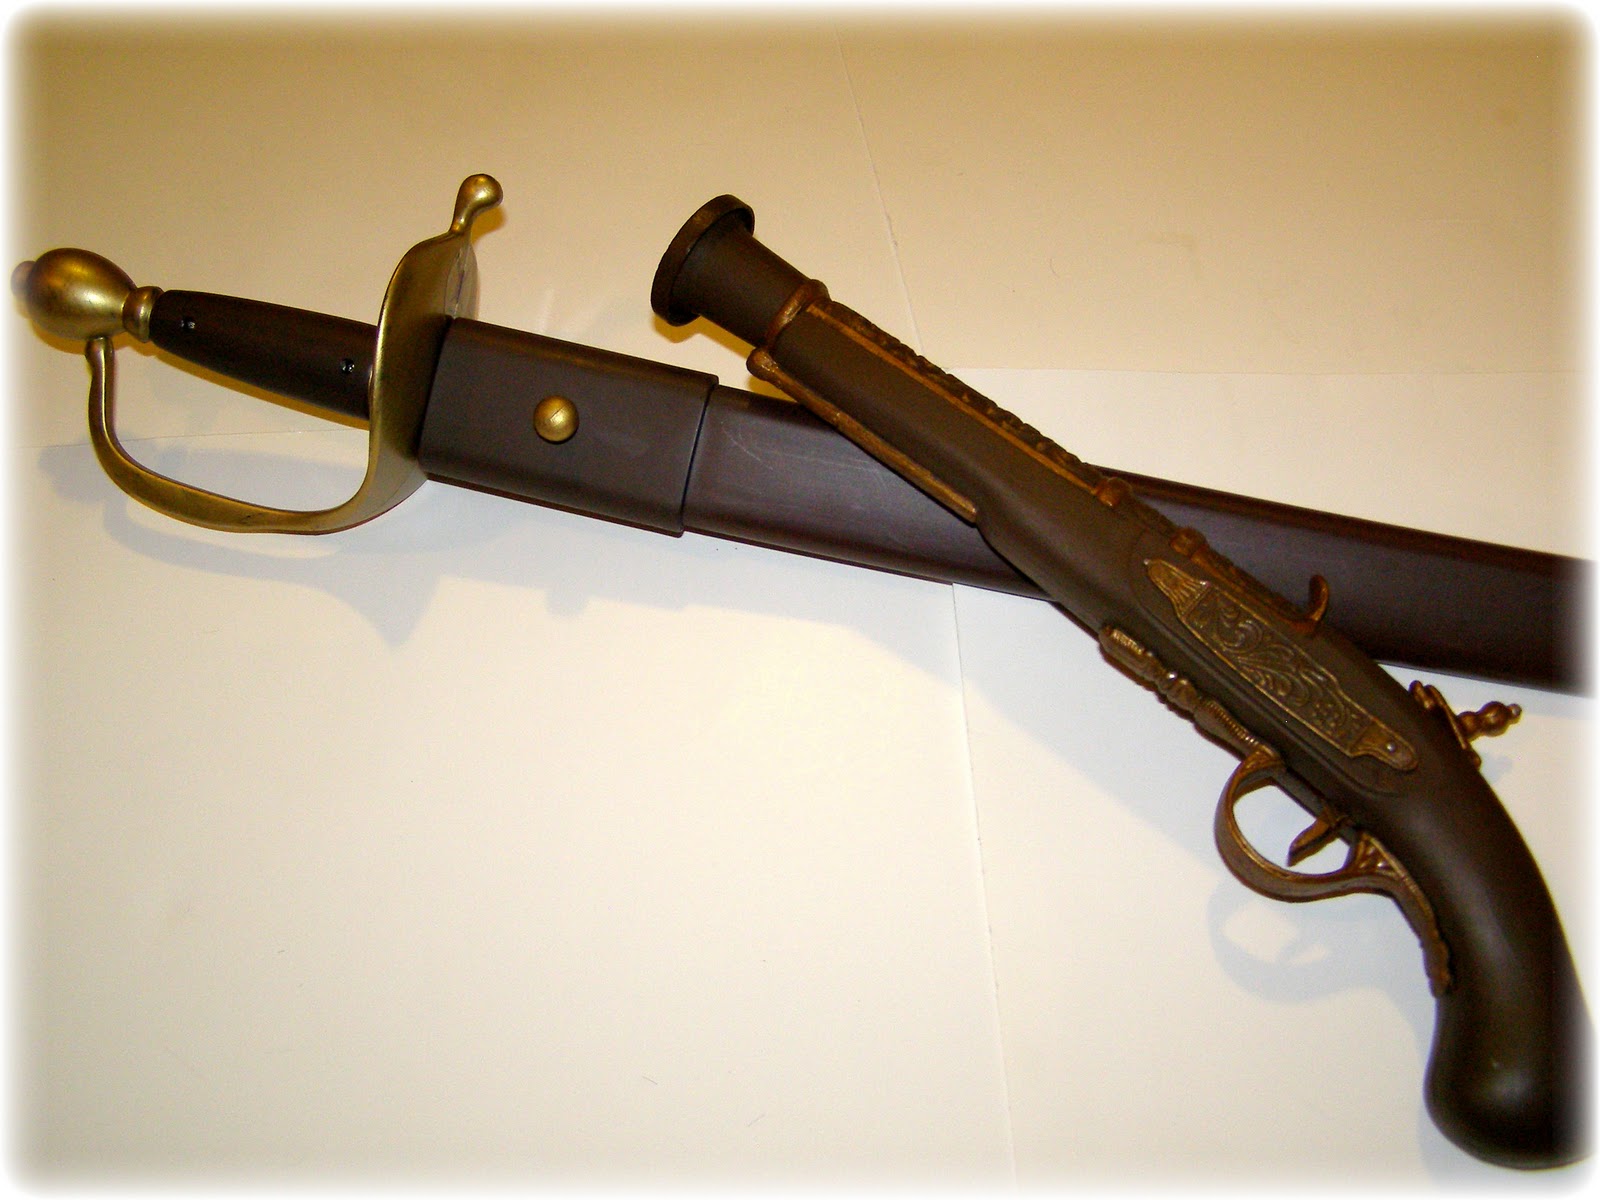
The Sword is the only thing that is actually from Pirates of the Caribbean. It has a stick on it with a scull & cross bones and that is pretty much it BUT when I saw it I was like I have to have that! I figured I was using things I already had for the costume and this was the one thng I would spend the most $$$ on. It cost $14.
The Gun is a cheapo Wal-Mart Safety Orange pirate pistol that I bought for a whopping three dollars. I have to admit I had a lot of fun painting it! I just used some craft paint I already had. I had no brown paint in my collection so I ended up mixing green, red and orange to get the right dark brown. I had a gold paint that I mixed some of the brown in to get that nice bronze color. Finished off with a touch of silver nail polish here and there for highlights.

THE BOOTS
Bought from Payless about 5+ years ago. Held onto them for so long because they are so confortable. The wedge heel makes them easy to walk in and the fur is very much in right now but not what I need for this outfit. I simply rolled the fur down and into the boot.


THE MAKE UP
I believe its hard to see the makeup in the video but I thought I would add it to the details here. First thing I did was pull out the ol' Elmer's Gluey, grab some pieces of tissue and begin on adding some scars and texture to my face. Take the Elmer's Glue add a bit of water and mix, wad and bunch little pieces of tissue and basically apply them to your face where ever you want. Word of advice, watch the placement of scars, if you add one where your skin moves a lot or will catch on something it will start to fall off. I ran the scar along my eye and over my eyebrow and it stayed until I was ready to remove it. To remove simply peel off carefully , like a band aid. Be careful around the eye area!
I added some bronzer to old foundation to give me a bit more of a tan & applied that in about two layers making sure to go over the scars carefully so they blended in. The foundation will cover up the whiteness of the tissue paper just fine.
I also used an the old foundation and several eye shawdows to give me that Dirty Look. I scrapped Brown, Grey and Green eyeshadow [separately] and added them to a little bit of the foundation and mixed. Wah-La instant face paint from stuff you already have!


{Can I just Say - I LOVE my Shadow! It took on its own persona & reminds me of a certain pirate, Guess he was there in spirit...}
Well there you have it my submission for the DIY costume for Halloween 2011! I did not want to do the typical "Dirty Pirate Hooker" costume that has become the norm. I wanted to look like I walked off of the set of Pirates of the Caribbean. Had I had more cash and time I would have went all out Barbossa, but a las I have no friends in the movie make up industry [sadness] I mean I really would go all out! Nose, beard swagger, everything!
Anyhow I seriously had a blast making the costume. From dyeing the shirt to painting the gun and finally finding the hat. It really was an experience that I relished. I am so ready to work on a movie set in the wardrobe or props department. Someone from POTC, have your people call my people!
Until next time my friends, I hope everyone has a safe and fun Halloween 2011!
Your Friend,
BlueFox
Just awesome. I love this
ReplyDelete