Showing posts with label DIY. Show all posts

Sunday, September 15, 2013

DIY Jewelry Re-purpose & Reconstruct With Distressed Denim Shorts


A quote came to my mind while working on this project and juggling the demands of a single parent. ‘Necessity is the mother of invention’ and for a fashion-ista whose pocket book is bare. Ideas like this excite me.

This project was inspired by the necessity to have something new in your closet. A broken necklace and a pair of distressed cut off shorts. Two unlikely pieces come together and make a go to classic that’s fun for the last dog days of summer.


The actual process of the video is simple. Take a part an old piece of jewelry and attach it to a pair of denim cut offs. The tools you will need, thread, needle, scissors, minor sewing capabilities, pair of shorts and some old or broken jewelry, a little bit of creative time. The jewelry bits can be attached with ease, just a couple loops and your done. Now a word of advice, if your going to take the time to bling out your shorts, I would only wash them when necessary and by hand.


                Hat – Forever 21
Wide brim felt western style hat. I must admit the felt was a bit floppier then what I expected after ordering it online. However, a few days after hanging on my hat wall seemed to force the shape I coveted.

Kimono Blouse / Robe – Forever 21
Black with pastel flowers a totally 90’s theme placed on a flowy classic. If you’ve watched me for any length of time you know I love the flow. Certain fabrics, billowing cuts always make me swoon, and this particular top is not short on the dramatics.


Shorts – Rue 21
My local Rue has been getting visits from this fox by the boatload. Try not to dismiss this store entirely, most would consider it throw away fashion. But, some of us are content with just that, cheap and cheerful. These distressed shorts were on clearance for $5 a totally Fox Find.

Purse – Ross
An oldie but goldy, I have had this bag off and on in rotation for about a year.


Jewelry – A little here and there.
The necklace is a key reference to Pirates of the Caribbean, those who know whom it belongs to forever receive my adoration. The scull stacked rings are from H&M, while the pine cone ring is from Burlington Coat Factory. The spikes and chained bracelet is from Forever 21.

Shoes – Ross
The black suede shoe I keep grabbing when it comes to blogging / vlogging. I love the 90’s throw back of high socks but I’m not sure I can pull off thigh high ones without getting off putting stares.


W A T C H   M E   O N   Y O U T U B E 


Tuesday, August 27, 2013

Summer Time Outfit Of The Day | Mint Blouse & DIY CutOff Jean Shorts


Just a simple outfit during the triple digit weather. 

Blouse - Old Navy.

 a version of the high / low trend that seems to be everywhere. Can I just say that I have worn this top non-stop since I got her? Sometimes Old Navy surprises me with pieces that are not only work horses in my wardrobe, but they also end up being a treasured piece. 


Jean Shorts DIY - GoodWill

. this is a DIY project I completed almost two years ago! Check out these videos to see how you can make your own and distress them.


or


HeadBand - Forever 21. 

I have worn this so many times I can honestly say it was well worth the $5 bucks or so I spent on it, and I will be truly devastated when it rips. 


Jewelry - H&M and Rue 21

The anchor ring and the chunky gold necklace are from Rue 21, recent purchases I might add. You may see a plethora of Rue 21 purchases from me since we have one in town and I always hit their clearance wall. 

The Gold Arrow necklace is from H&M, I have worn this a couple times here on You Tube, usually with the little smaller version it came with. Very chic piece.

The clutch is another H&M piece and I love how versatile it is, causal and dressy outfits seem to be effortless with this classy neutral. 

The wedges are from DSW - Guess, and I purchased them last year and they are still a summer fav for me. 

Check out the video for a visual of the entire outfit for effect lovelies!


See ya next time my foxy vixens! 
Blue

P.S. A special thanks to two of my dear friends for injected my blood with creativity. Kitty Katt and Gonzo. Love you my friends. 


Wednesday, August 1, 2012

DIY How To Make A Cat Toy


This is a fun and easy project to embark upon on a lazy weekend with a handful of close friends, or solo. Using things you may already have close at hand will get you through this project and your furry feline palm will be ever thankful.

TOOLS


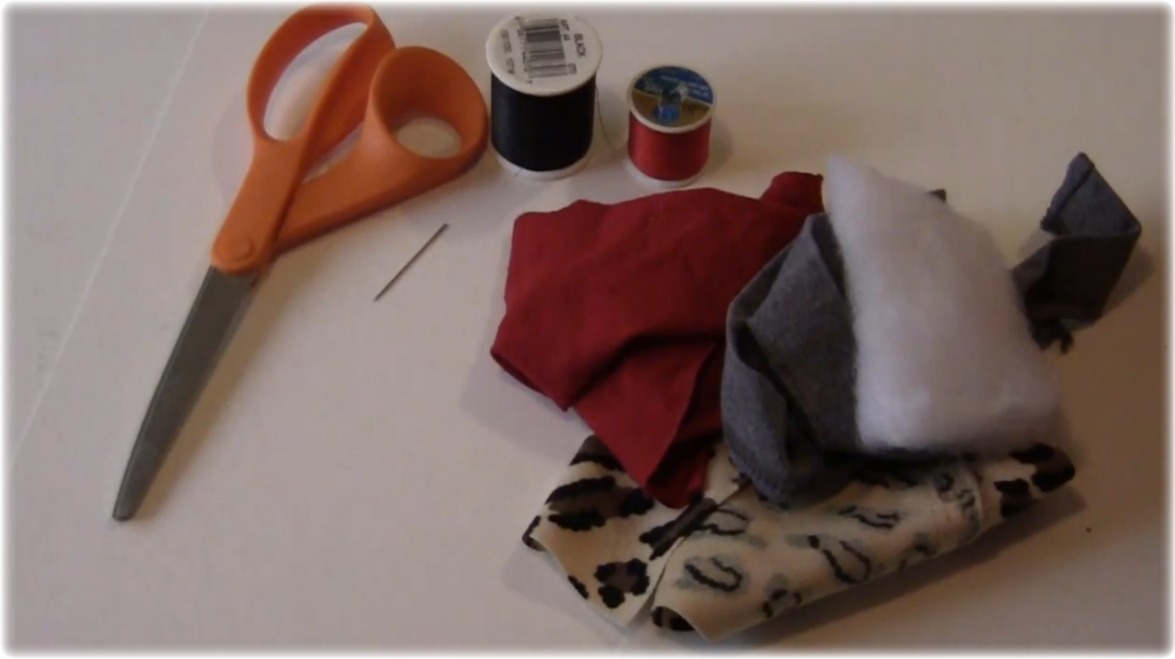
Scraps of Material: I have a bag that is full to the brim of scraps, leftover from previous projects. This is the PURR-fect way to use them up. If you find yourself lacking in his department consider chopping up a couple of old tee-shirts or hit the thrift shops and scour the $1 racks for interesting prints.

Scissors, Fabric Chalk Thread & Needle: A good set of fabric cutting scissors will get you through this project and many others. Invest in a simple pair at your local thrift shop and vow to only use them for –cutting fabric. Fabric chalk can be used to draw out the shapes but I find it is not necessary, freestyle works just fine. If you do not trust your freestyle cutting skills, a white colored pencil or even a piece of bar soap will work in a pinch. Thread in a few shades, a good needle and some time is all you need. I used a whip-stich to sew the body and I definitely recommend that you make your stiches nice and secure. Especially on the eyes and ears, we do not want kitty to be able to take it apart during some overzealous play.

Batting: The actual stuffing of the project. You can find this in a fabric store and generally a big bag of it. More than what you may need for this project. To save cash consider using cut up pieces of your scrap fabric to stuff the toy with or even some cotton balls. 

Optional: Bells and catnip are fun things to add on if you’re feeling feisty.

TIPS


I started with a four by four inch square for my mice, but you could go bigger or smaller.

Once you get a mouse or two under your belt, would it not be fun to switch up the design and come up with your own toy? A little bird or bat could be fun!
Consider textures and what your cat loves when you start making your mice. Some cats love rough textures, some love a good feather or even metal [ I used a leftover piece of zipper for a tail. ] Some love a good squeak; you can find squeakers at pet shops and put them inside your mouse for a bit of noise. A cat or two may enjoy that crunchy noise, so you can add some crumpled paper inside to get that effect.
Above all have fun making a little something for you beloved feline pal; they will love you back twice as much.


Monday, April 30, 2012

DIY - Jewelry Box


{ This is what it looked like before the stain. }

Got an old jewelry box laying around? Let do something with it!


TOOLS

An Old Jewelry Box, for this project I used one I found at the thrift shop.

Wood Satin: Find a color you like at Lowe's, Home Depot.   

Sand Paper: Fine grain find at Lowe's, Home Depot.
Sponge Tip Paint Brush: One for the stain, one for the decoupage. 


News Paper: Use lots to keep your work area tidy.
Decoupage Medium: Find at Joannes, Michaels or craft and hobby stores.

A Pencil & Popsicle Stick: A pencil can help you mark the place where you want to place your picture. A Popsicle stick can help flatten then picture the first round, to avoid air bubble underneath.


Picture of Your Choice: I printed my picture out, if  you do this I suggest multiple layers of thin coats a top the photo. This will keep the ink from running. Test run a photo before you do the project to see if you can pull it off. I did about 6-7 thin layers on my letting them dry for a while in between. You can also use fabric, magazine clippings, etc.


TIPS 

Do this project when you have plenty of spare time.
Do this outside -no exceptions-
News Paper is your friend.
Don't want to use stain, try painting it or use spray paint. 
Tape: Use if you want to protect the hardware of the jewelry box. Put tape where you do not want paint. 


Catch ya later...
BlueFox